How do you turn an empty corner filled with potential into an inviting retreat? Repeat shapes and add layers of color with plants, containers, cushions and wall art. With some easy-to-find materials and a few days of work, you can transform a blah space into the inviting getaway above.
Sometimes it’s nice to have a patio escape away from the house! At 14½ ft. long and 9½ ft. wide, this one has plenty of room for furniture and a few friends to move around without tripping over each other. On the other hand, you won’t feel lonely even if you’re the only one enjoying a morning cup of coffee and listening to the birds. If you want to know exactly how to build this paver patio, check out these detailed instructions. If you already have a patio space and want it to look amazing, you’ll need the patio design ideas shared below!
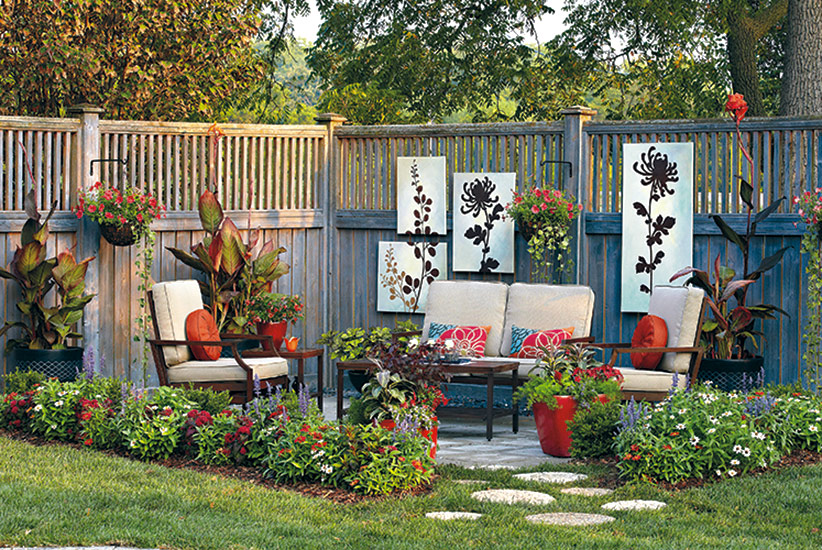
Use plants to break up strong lines
With plants, such as the tall cannas (Canna hybrid) in the photo above, you can make a tall privacy fence seem less intimidating. Flanking the chair in the photo at left, they make this seating area much more welcoming. The curves and swoops of the leaves gracefully break up all the vertical and horizontal lines. A bonus with this cultivar is that Tropicanna™ canna has bronze foliage, which coordinates well with the color scheme of the garden and warms up the cool gray stain on the fence. If this doesn’t fit your needs, there are many other cannas with different colored foliage and flowers.
Canna tips
- Save money on cannas by buying tubers and starting them in nursery pots.
- Cannas are easy to grow, cold-hardy in zones 7 to 12 and do best in full sun.
- Where they’re not cold-hardy, dig and store the tubers in fall.
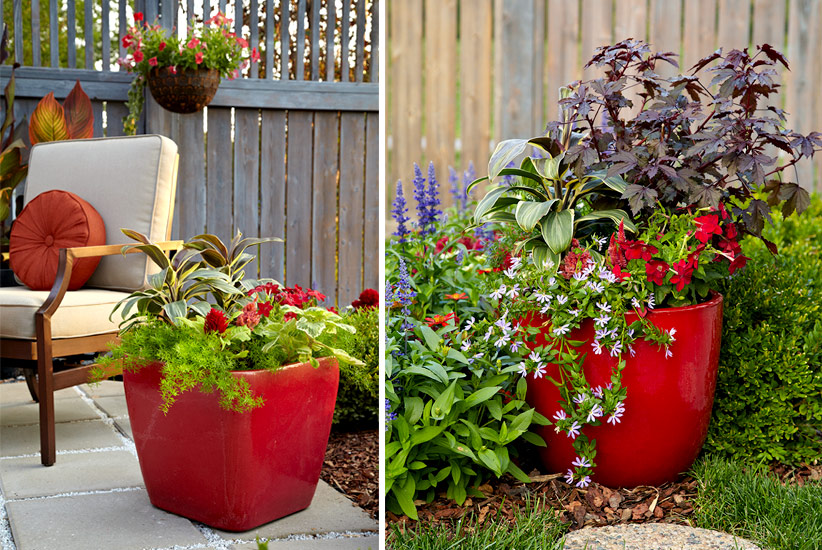
Create a color scheme with patio containers
The containers in this patio space vary in shape to echo the squares and circles used in the patio. Repeating the reds and oranges from the garden helps everything look pulled together. That’s not to say an accent color, such as the purple of the fanflower isn’t a good idea. However they’re put together, containers are a great way to bring a piece of the garden closer to enjoy.
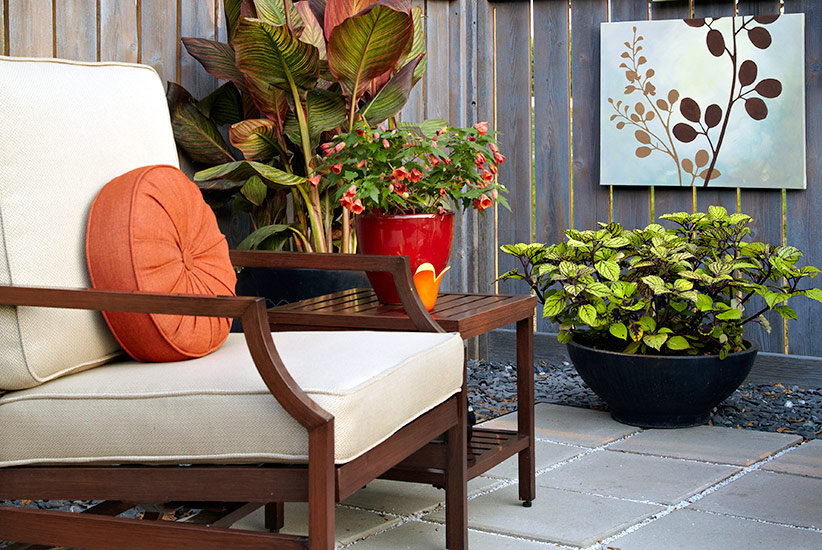
Simple containers still make a big impact
To keep the back corner from looking empty, we added the low bowl of coleus (Plectranthus scutellarioides hybrids) below. A simple planting of just one cultivar has bigger impact than a mix would. This one, ‘Fishnet Stockings’, is chartreuse with dark purple veining.
Container tip
If you don’t like moving heavy ceramic around your patio, consider composite, resin, or fiberglass pots. Though they don’t look it, they’re lightweight and easy to move around and available in almost any color and pattern to suit your patio style.
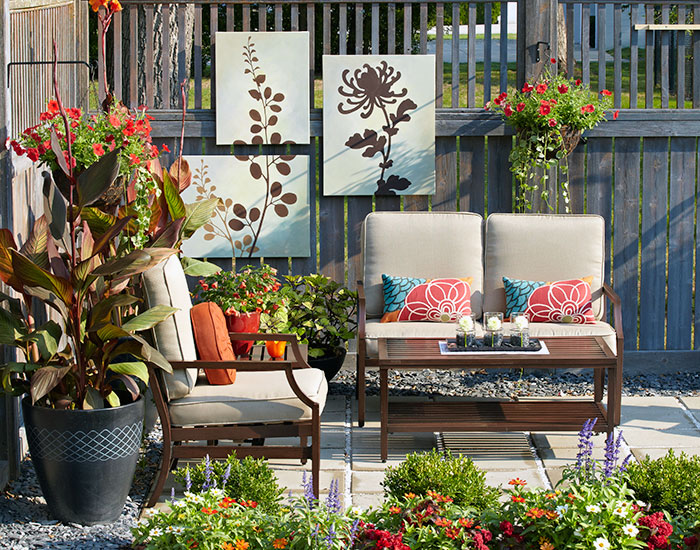
Don’t be afraid to add outdoor artwork!
Mounting art on the walls isn’t limited to the house. You can get primed and weatherized canvases with lovely images on them to hang outdoors, rain or shine. Use them on privacy fences, the wall of your house or hang them out in the garden as an ornament. If you don’t care for the selection you find while shopping, check out our 5 tips for great outdoor wall art below to see how to make your own.
5 tips for great DIY outdoor wall art
These gorgeous wall hangings are simple to make and can stay outside from spring through fall. We ordered the stencils from ModelloDesigns.com. Follow the directions that come with the kit, and you’ll have beautiful wall art, too.
Here are some tips we found that really helped:
1. If you can’t find one large canvas, use several smaller ones and split one stencil between two (photo above). We used 20×24, 22×28 and a 24×30-in. canvases for this grouping.
2. Even if your canvas is already primed, add a coat of exterior primer. The brand we used was Zinsser®.
3. You can buy little bottles of acrylic paint for exterior use from the craft store or get sample pots of house paint from the hardware store. We used both — the background is house paint and the stencils are the Folkart® brand of acrylic paint.
4. Add depth to the design by using more than one color. Dark colors like the brown tend to come forward and lighter ones like the tan recede.
5. When the paint is dry, remove the stencil making sure to pull the stencil away from the surface at an 180-degree angle to prevent it from tearing. After you remove the stencil, spray or brush on two coats of clear exterior sealer. Be sure to get both the front and back of the canvas. Let it dry thoroughly between each coat.
Select accents & details for a finished look
It’s the details that make this patio look smart and sophisticated. A few cushions, some candles, cut flowers — even the way the furniture is placed — all has an effect. Natural materials, from the plant-filled containers to the stone in the centerpiece, help bring a little bit of nature closer for you and your guests to enjoy.
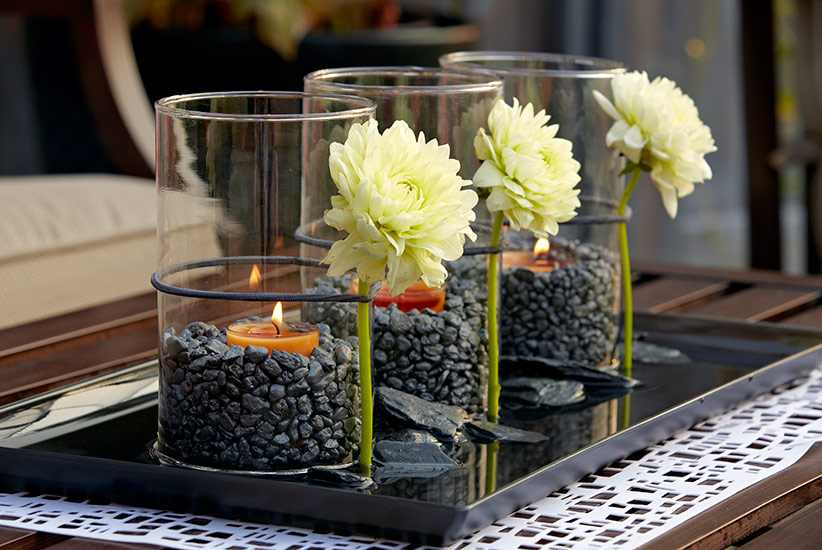
Above you can see an inexpensive tray becomes an elegant centerpiece with a few candle holders, some stone and flowers. Put water in the tray for the cut flowers to sip — an elastic hair band secures fresh-cut dahlias to each glass vase. Adding pieces of slate from the border near the fence add texture.
Find the right patio furniture
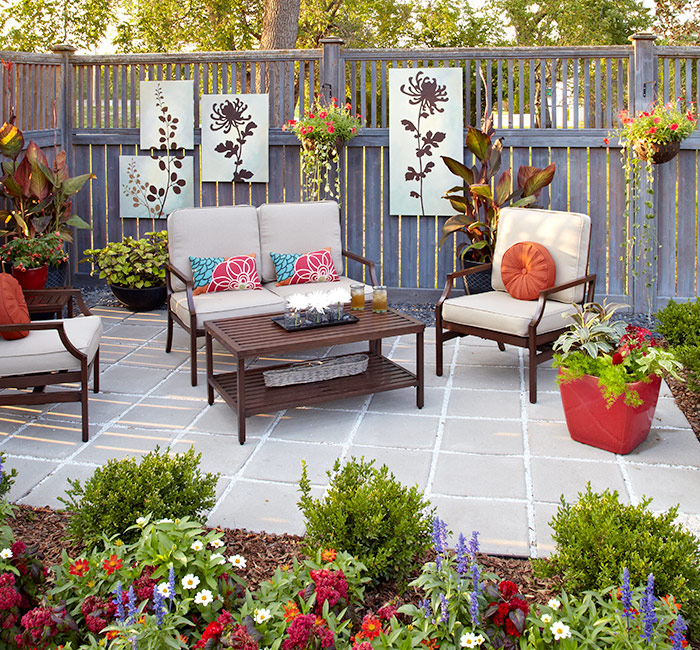
This small furniture set is meant for a few friends to gather and relax. Once it’s in place, there’s no need to move it around a lot like you would a dining table and chairs. (It’s a good thing, too. All those spaces between the pavers would make it difficult to move chairs in and out). Sticking with a neutral upholstery allows you to switch the color palette anytime you like and add colorful pillows for accents.
Add texture with natural materials
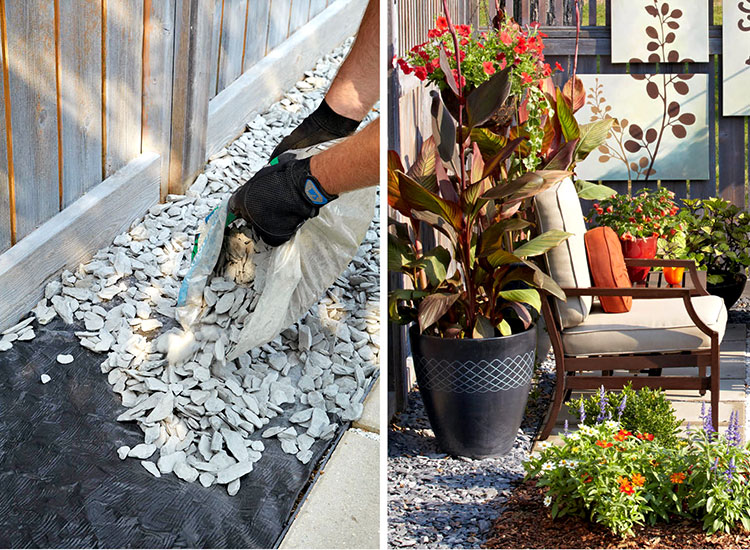
A 2-ft. space filled with slate chips between the fence and the patio gives a little breathing room and keeps the furniture from getting shoved up against the wall. Put down a layer of landscape fabric over the area then add the slate chips.


